Monday, December 6, 2010

Great Stocks...a cold weather staple


Stocks have so many uses in the fall and winter, that I make sure I always have some on hand.


Here I've made two very similar, yet very different chicken stocks.  The first a basic stock with good flavor and rich in gelatin.  Then a second one made from the first stock using roasted bones.  In the restaurant I referred to this second stock as double dark chicken, or 'dbl dk chix'.


Rather than list a recipe with specific amounts, a quick understanding of proportions will get you on your way.  The starting point should be your stockpot...get twice as many bones as will fill that stockpot about 3/4 full...
Now for the aromatic vegetables that will flavor the stock.  Unlike baking, no exact measurements are needed here.  The total amount of the vegetables should be about 1/3 the volume of the bones.  A good rule of thumb for the mix is about 50% onions, 25% carrots and 25% celery.  If I happen to have some fresh fennel around or some parsley stems, I’ll throw those in as well.


The size that you cut the vegetables does matter and here is why.  You want them to release all of their flavor into the stock, but you don’t want them to cook so long they fall apart, clouding the stock.  So the longer a stock will simmer, the larger you will want to keep the vegetables.  For the chicken stock, I cut onions in quarters, and the carrots and celery in about 4 inch lengths.


For the first stock...


Pour enough cold water over the bones in the stockpot to just cover and slowly bring to a simmer...adjust the heat so it never boils...just bubbles occasionally.  Logic would dictate that starting with hot water would give you a head start on the cooking, but it will result in a cloudy result, so avoid the temptation. 


 As it slowly comes to a simmer, both fat and foam will rise to the surface.  Skim this away as it collects.  Simmer the bones for about 45 minutes to an hour (continuing to clean the surface) then add the vegetables.  Continue to simmer until the bones fall apart easily.  Chicken stock only needs to cook about 2-3 hours, after that you are simply cooking away those fresh flavors.  Strain the stock through a fine mesh strainer and discard all of the bones and vegetables.  Let the stock sit a few minutes, then skim off any remaining fat.  Cool the stock quickly and store in the refrigerator, or go directly to making the second stock.


For the second stock...


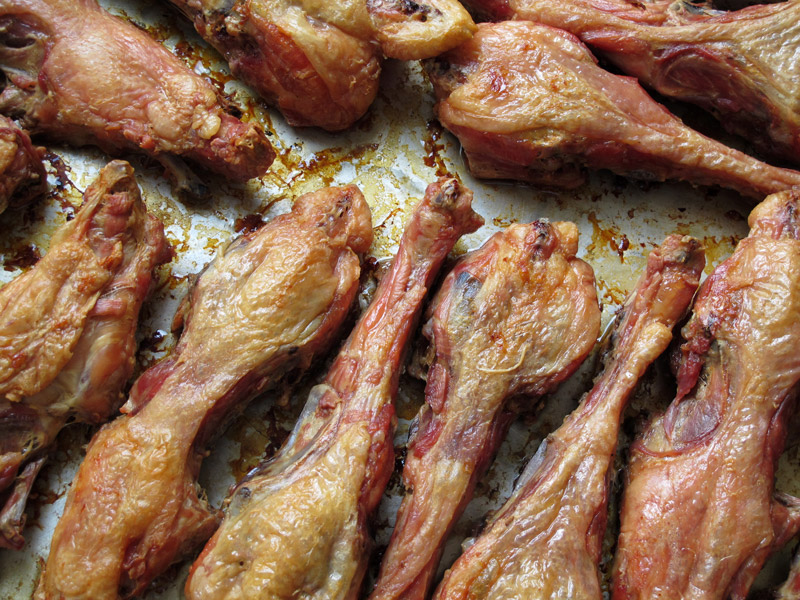
Roast the second half of the bones in the oven until they are very well browned, making sure not to let any pieces get too dark.  Once browned, remove them from the oven.  If any of the bones happen to get to dark, just remove those portions.  Just a small piece of bone blackened in the oven can impart its bitterness on your entire batch of stock.  After adding the bones to the pot, pour off any excess fat from the roasting pan, then scrape all of the crusty brown bits from the bottom into the stock pot.  These bits are culinary gold and your stock will suffer without them...don’t let them get away.  Alternatively, you can put the pan on a medium flame, add some of the stock and simmer slowly to dissolve the bits stuck to the bottom.  Add all of this to the stockpot with the bones and the 1st stock you made.  Give this one about a 1/2 hour head start, then add the vegetables and cook for another hour to hour and a half.  There will be much less cleaning to do as this stock cooks, but it should be tended to, nonetheless.


Again, strain the stock, skim any remaining fat and cool and store as quickly as possible.


Now take advantage of the fact that you have some great stock(s) at your disposal.  Make some soup, or better yet...braise something!

Monday, July 5, 2010

Fresh Flavors of Summer

Cooking can be defined as:
"the act of preparing something (as food) by the application of heat"
(the Collaborative International Dictionary of English)

So I guess, then, that much of Summertime "cooking" isn't really cooking at all...a case in point...


A few simple ingredients can be coaxed into a tasty and satisfying dish without ever going near the stove...and isn't that great when it's over 90 or 100 degrees!

Here I started with a few tomatoes, one summer squash, some basil all from the garden as well as lemon vinaigrette and some burrata left from a small event I did over the weekend.

I like the results of treating squash this way...I slice it thin on a mandoline, lay it out flat and sprinkle on a small amount of kosher salt and wait about 15 minutes.  As it sits, the salt draws moisture from the squash that beads up on its surface...simply press paper towels onto the squash to remove it.  This accomplishes a few things...it seasons the squash all the way through, it gives it a pleasing texture that bends rather than snaps and it also concentrates the flavor by removing water.  This purging technique is an important step to some other preparations as well such as making pickles, raita (cucumber/yogurt sauce from India), eggplant (where it also extracts some of the inherent bitterness) etc...

The rest of this salad is simple...season everything (don't add any additonal salt to the squash) individually and assemble.


...the few early offerings from the garden...


...use a mandoline to slice the squash thinly and evenly...most professional cooks have a Benriner which is more practical and affordable than the larger more expensive French metal types...


...it doesn't take much salt do draw out a lot of moisture, and since the slices are so thin, any more than this would just amount to salty squash...no good...


...don't forget to season everything...here the cut tomatoes get salt, pepper and some good extra virgin olive oil...for this dish I prefer a fruitier version...nothing assertively peppery...


...the burrata gets the same salt/pepper/evoo treatment (be sure to remove the cheese from the refrigerator about 20 minutes before serving to allow it to come to room temperature), then the assembled salad is drizzled with the lemon vinaigrette...

Now THAT is Summer on a plate!

Saturday, July 3, 2010

Syrupy Goodness

I've been experimenting lately with desserts.  At the restaurant, there was the pastry chef, but now that I am out on my own, I'm working on my repertoire.  (I was lucky enough to have chef Yulanda Santos with me when I was at Calistoga Ranch...she is now pastry chef at Dry Creek Kitchen in Healdsburg, CA...if you find yourself there, check out her desserts...they are as beautiful as they are delicious)


Here is a great technique that is equally at home in savory dishes (think foie gras, roast pork, duck confit...you get the idea) but here . . . a couple of sweet examples.


The basic technique flows like this...
  • make a caramel
  • add vinegar and reduce a bit to a syrup
  • add spices, steep, remove
  • add fruit and cook


Now, here are my variations for two fruits...


For the rhubarb, I made enough syrup so that the pieces could swim in it.  I cooked them on a super low flame, basically just wilting them, allowing them to cool in the syrup.  You can see how well they hold their shape.  As far as the spices, I used cinnamon stick, allspice and a cardomom pod.  For vinegar I used champagne vinegar.


I served the rhubarb with these "baby cakes" from Julia Child's "Baking with Julia".


For the cherries, I made just enough of the syrup to coat the bottom of the pan, and cooked them over a  higher flame, giving them a gentle, occasional toss.  As they cook, they add to the syrup by releasing their own natural juice.  Fresh cherries like these only need a couple of minutes...they will continue to soften as they cool, so err on the short side.  As for spices,  I think the cherries stand up to a more assertive mix and I went with cinnamon stick, allspice, cloves, star anise (VERY little) and black peppercorns.  I used red wine vinegar.

I served these cherries with panna cotta...I love Suzanne Goin's creme fraiche version from "Sunday Suppers at Lucques"

So obviously there are many variations on this idea as different fruits come into season.  Just think about how the spices and vinegars work with the fruit you are using (and the dish overall).   Also think about the balance of sugar to vinegar.  While a more acidic treatment might marry well with a fatty pork chop, it might be out of place in a dessert.  You could be tempted to omit the vinegar entirely for a dessert, but that can leave the dish cloyingly sweet...cooking is all about balance.


Soon santa rosa plums will be in the markets and I think I'll try those with lemon verbeena and champagne vinegar.

Wednesday, June 30, 2010

Here's to Fast Food!!


Like anyone, I don’t always want to spend a lot of time cooking for myself, but I do want to eat meals that taste great.  I go through food phases...and right now I’ve just fallen into another farro kick.
I’ll boil up a big batch of farro, give it a little salt, pepper and olive oil and keep it in the fridge...when it gets low, I boil up another batch and this continues for a few weeks until I’ve had my fill...
It takes some time to cook (a good hour long simmer usually does the trick), but once it is in the fridge, it has you eating a healthy meal in as little as 10-15 minutes.
Today, I had just one summer squash and one padron pepper from my garden...add in a little farro and I had myself a great lunch.


Here’s what I did:
Slice up the squash and the pepper and saute in some olive oil (and a little salt and pepper) until both are tender, tear the blossom from the squash into strips and add them to the pan along with some rough torn fresh basil.  Give the pan a quick toss and add in the pre-cooked farro and let it warm through slightly and check for seasoning.  Off the heat, add a small squeeze of fresh lemon...this really wakes up all the flavors!
There are endless possibilities and it is a great way to use up what you happen to have hanging out in the fridge (or the garden).

Experiment with your own combinations and enjoy Summer's bounty!!!

Friday, May 14, 2010

A Simple Treatment For Some Amazing Carrots...

I picked up these carrots at the farmer's market on Thursday.  I've got no events this weekend but it had been a while since I played with some food and the camera at the same time...


No peeling needed...a good scrub, a rinse and a pat dry...


The parsley and the thyme were clipped from my new garden (more on that soon).


After nothing more than salt, pepper, thyme and olive oil they are ready for the pan.


...like candy...


Saturday, March 6, 2010

My Ad in Edible Marin & Wine Country Magazine


I just picked up the Spring issue of Edible Marin & Wine Country Magazine and it is beautiful!  It has me excited about all of those great ingredients that have started trickling into the markets.  Some things have begun, such as asparagus, spring garlic & strawberries, while others are enticingly close (think english peas & fava beans).

I chose this publication in which to place my first advertisement and I could not be happier with how it turned out.  The magazine and the way I cook and shop could not be more in tandem and I fully expect it to help me reach the audience I am after.  

Here is the ad:


If you are not familiar with this magazine (or any of the Edible Communities publications) do yourself a favor and add it to your reading list.

Edible Marin & Wine Country was started by Gibson Thomas who I have gotten to know a bit through the process of getting the ad ready for the magazine.  She is very talented, very driven and very supportive of community, its artisans and the relationships that help connect them.


You can help support what she is doing by becoming a regular reader of the magazine and help the cause (and your own well-being) by supporting your local farmers markets and the hard working folks who sell their fruits, vegetables, meats, cheeses, dairy, breads, crafts and so much more.

See you at the market!

Friday, February 12, 2010

Sara Remington's Lecture at CCSF


Since I first discovered Sara's incredible work close to a year ago I have made it my personal mission to meet her and talk to her about her images and experiences as a photographer.


Knowing how busy she keeps herself, in an industry where many very talented photographers are struggling to find work, it was that much more special that I was able to attend her lecture at the City College Of San Francisco this past Monday.  (Special thanks to Marshall Berman, whose class she was speaking to, for extending the invite!)


I had so many questions to ask her, a few of which were answered through the course of her lecture, and a few more that I asked directly.  I'll admit holding a few back in hopes that we will soon get the chance to get together at her beautiful studio and talk some more.


You should NEED to go visit her website and take a look at her beautiful photographs.  


Are you still here?  Go...seriously, I'll wait...


You're welcome!  (thanks for coming back...wasn't sure you would...)


Sara is not just a food photographer, but shoots travel and lifestyle as well.  She has some great work on her blog from trips she took to Argentina and to Calabria, Italy (both current book projects).


I have spent so much time in the year since leaving the commercial kitchen looking at food photography.  Having looked at so many sites and in so many magazines, I've yet to find any work that inspires as much as hers.  I don't know how to describe it other than saying her images still have their soul intact.  There are so many "pretty pictures" out there...so many technically great photos, but many just don't tell a story.


In the same way that I love cookbooks that are more than just about the food itself, I love photography that gives you the sense of a place and the culture that supports a cuisine.


Wednesday, February 3, 2010

My Beloved Knives, Part 6

Forschner

(6 inch boning & formerly 6 inch boning)

These Swiss made knives are without a doubt the most bang-for-the-buck knives in my kit.  They are very well made and, at about 20 bucks each, a real bargain.  I really do love to butcher, and these knives make the job a joy.  They've helped me break down maybe fifty whole lamb, literally thousands of chickens and countless other ducks, rabbits, quail and the like.  If you happen to be a vegetarian do not read the previous sentence...see, I'm a compassionate guy.  My meat fabrication teacher at the CIA used a knife that looked like the one on the bottom in the picture above but the blade had been worn down even thinner.  I remember wondering how that could possibly happen...how could a knife get used so much (and resharpened...or should I say re-shape-ened?)...to get that thin...and of what use is it then?  I have two more of these knives that are worn to degrees between these two, so I guess I no longer wonder how a knife can get so worn.  This instructor was a true character...tons of energy...he spent many years working as a cutter in a Hormel plant and was also an umpire for Major League Baseball...a fairly common combination of jobs, I'm sure you would agree.

Monday, February 1, 2010

My Beloved Knives, Part 5

MAC


(8 1/2 inch chef's & 3 1/4 inch paring)


These are my favorite and most used knives.  These great Japanese knives are light, thin, and nimble...and "relatively" inexpensive.  I used to be able to get the chef's knife for about $90...now they are closer to $150.  To some of you this may not fit into the admittedly stretched category of inexpensive, but they are an absolute dream to use, hold an edge very well and will last a long time.  I used to think I loved the larger, thicker, heavier German knives but once I got used to the "mighty MAC" there was no looking back.  Now when I go back and cut something like carrots with the Friedr. Dick knife it feels more like splitting wood with an axe.  It cuts the first third of the way, then just splits the rest of the vegetable before the blade has a chance to slice.  No nice smooth cut, just splintered shards.  The MAC, on the other hand just feels like it is gliding through.  My first MAC was a gift from a chef I was working for who always seemed to hate my "big klunky German knives".

There is no right or wrong, here...use what you like.  To me it is a bit like golf clubs or skis...such a personal choice.  Ultimately, it's about the end result.  Do your golf clubs help you enjoy the game and shoot better scores?  Do your ski boots hug your feet just so after hours on the mountain?  Does your knife fit YOUR hand comfortably and help you get the results you are after?

Saturday, January 30, 2010

My Beloved Knives, Part 4

Gustav Emil Ern


(9 1/2 inch blade)


This knife was a leave behind by a former roommate and co-worker (he stole from me while we lived together, so don't think too poorly of me for not tracking him down to make sure he gets it back).  When I found it in a random box in the garage it looked like something I probably should have just thrown away.  Every square inch of the metal was pure rust!  It felt hefty and well made in my hand so I figured it worth taking a chance on and I brought it to my "knife doctor".  He did the most amazing job in bringing it back to life and, in doing so, revealed that amazing stamped logo.  I love this knife's character and it's what I use for hacking up bones (oops, that makes it sound like I'm coughing up bones...maybe whacking is the better word) to make stocks and sauces.  If you look closely, you can see some pretty significant nicks in the blade.  Poor guy, his last job was chopping up some very sturdy venison bones while I was still chef at Calistoga Ranch.  I have since relegated him to more suitable bone chopping jobs such as fish frames, chicken, duck, and rabbit bones, to name a few.

Thursday, January 28, 2010

My Beloved Knives, Part 3

Friedr. Dick

(8 1/2 inch blade)


Ok, so it's not the most macho chef thing to have your name engraved on your knives, but let me explain.  This is one of my culinary school issue knives, the same one everyone at the school has...need I say more?  This is a heavy, thick, sturdy German knife.  No longer my style (...future post...) but it still gets some use in my kitchen.  This one comes out when I need to halve a large winter squash (if you've ever tried cutting a kabocha, you will know what I mean) or filet a whole salmon where my more delicate Japanese knife might get dinged.  When my family and I were in Venice one of the vendors at the Rialto Market was using a saw very much like this one...


to cut these kabochas (photo credit to my sister, Robin...go Robs!)...


Tuesday, January 26, 2010

My Beloved Knives, Part 2

J.A. Henckels

(6 inch blade)

When I first went to visit the Culinary Institute of America as a junior in high school I took a look around their bookstore (a school I would attend many years later after 8 years of cubicle hell working in the insurance industry).  I remember a huge glass display case filled with different Henckels knives.  I guess it made an impression since I bought this one soon after that trip.  You may notice that the blade has taken on a bit of a concave shape...this is from the many times that I sharpened it on my whetstones...evidently with sub-par technique.  Some chefs like to sharpen their own knives, some don't...I don't (though I used to).